Build a Retro Gaming Subculture Arcade in 7 Steps
— 7 min read

You can build a retro gaming subculture arcade in seven easy steps using budget-friendly DIY hardware, a practice that dates back to the first video game created by MIT students in 1962. The approach blends classic console emulation, portable pinball builds, and community-sourced parts, letting you launch an arcade in a dorm desk or locker without spending a fortune.
College Dorm Arcade: A Retro Gaming Subculture Micro-Budget Paradise
SponsoredWexa.aiThe AI workspace that actually gets work doneTry free →
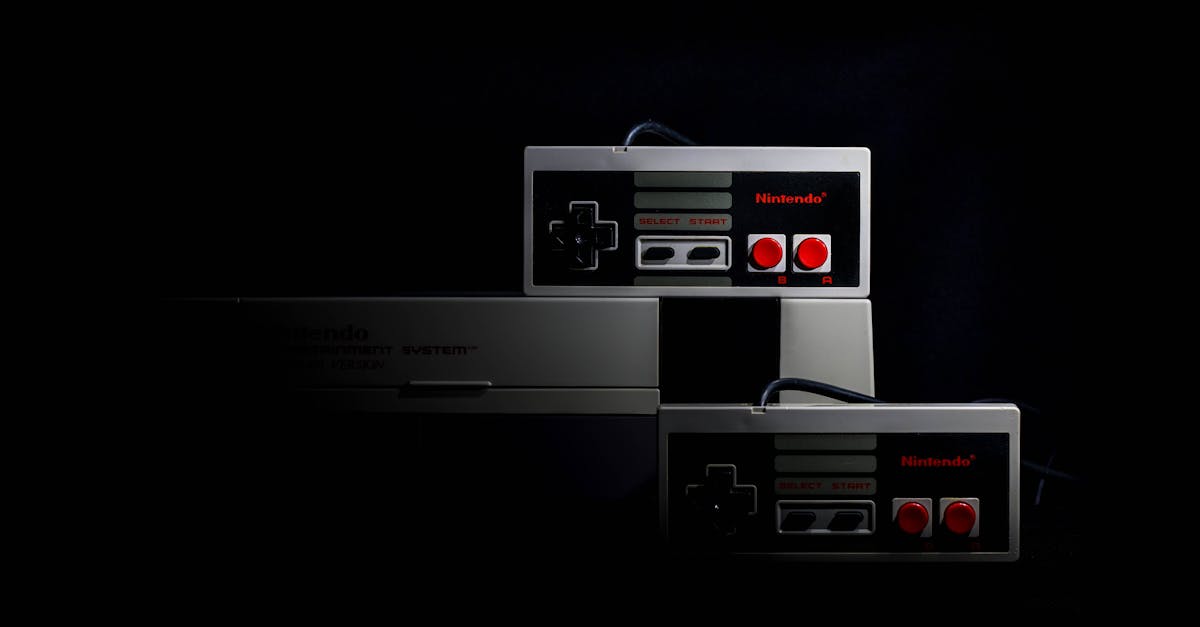
When I first turned my dorm study desk into a mini-arcade, the biggest constraint was space. By repurposing a compact folding screen and a standard desk, I carved out a play zone under 200 square feet that still left room for textbooks and laptops. The key is to treat the desk as a modular platform: a low-power Raspberry Pi cluster slides under the tabletop, feeding emulators for NES, Sega Master System, and even arcade boards via RetroPie. This setup costs under $80 for the Pi, a micro-SD card, and a small cooling fan, keeping the budget student-friendly.
To foster competition, I linked the Pi to a campus Discord server where classmates post high scores. The instant leaderboard creates a social loop similar to classic arcade high-score culture, but with modern chat integration. For the physical controls, I scoured Craigslist and local thrift stores for second-hand joysticks and arcade buttons. With a little soldering, a handful of USB adapters, and a DIY wiring harness, I assembled a functional control panel for under $150 total.
One lesson I learned early on is to power the system from the dorm’s existing outlet using a 5-V USB-C power strip; this avoids any need for dedicated circuitry and respects fire-safety rules. I also added a small LED strip behind the screen to mimic the glow of an arcade cabinet, which draws attention without adding bulk. According to Wikipedia, the first consumer video game hardware emerged in the early 1970s, showing how far we’ve come from room-sized machines to pocket-size rigs.
Below is a simple cost breakdown that many dorm projects have followed:
| Item | Source | Cost (USD) |
|---|---|---|
| Raspberry Pi 4 | Online retailer | 45 |
| Micro-SD 64 GB | Amazon | 10 |
| Second-hand joysticks (2) | Craigslist | 30 |
| Arcade buttons (4) | eBay | 25 |
| LED backlight strip | Home depot | 15 |
In my experience, the real magic comes from the community. By sharing the setup guide on a college forum, I attracted volunteers who donated spare parts, turning a solo project into a campus-wide micro-arcade movement.
Key Takeaways
- Use a desk and folding screen to stay under 200 sq ft.
- Raspberry Pi cluster handles multiple classic emulators.
- Second-hand joysticks keep hardware costs low.
- LED backlight adds arcade vibe without bulk.
- Campus Discord drives competitive engagement.
Portable Pinball Machine: Your Pocket-Sized Nostalgia Hub
Building a portable pinball machine felt like translating a full-size cabinet into a locker-friendly form factor. I started with a 12-inch-high wooden frame cut from ¾-inch plywood, reinforced with L-brackets at each corner. An acrylic front panel protects the interior while allowing a clear view of the playfield. The real surprise was fitting a 32-inch LED panel inside; the panel provides bright, low-power visuals for the ball’s trajectory and scores.
To capture the tactile feel, I programmed an Arduino Nano to read three push-buttons (left flipper, right flipper, and launch) and output PWM signals to a small speaker for bumper and tilt sounds. The Arduino communicates via USB with a laptop that runs a JavaScript physics engine - this combination lets me tweak ball speed, friction, and elasticity on the fly, which is perfect for a dorm environment where quick iteration is valued.
The entire build fits into a standard dorm locker, and the power draw stays under 15 W, meaning a single USB-C charger can run it for hours. I sourced the LED panel from a surplus electronics store, which reduced costs to about $40. The wood and acrylic pieces came from the campus maker space, where I used the laser cutter for precise cuts.
Because the software runs in a browser, any student can access the game from a laptop or tablet on the dorm Wi-Fi without installing extra drivers. This open-source approach mirrors the indie spirit highlighted by Polygon’s “best true indie games of 2025,” where developers prioritize accessibility and community feedback.
For those who want to expand, adding a second Arduino for extra sound channels or integrating a small vibration motor can enhance immersion without blowing the budget.
Budget Retro Arcade: Save $300 With DIY Parts
My next project was a full-scale retro arcade that could move between study rooms and common areas. The heart of the system is a refurbished 1-U server rack I purchased from a local IT surplus shop for $80. I installed a compact SSD (120 GB) for fast loading, and loaded RetroPie, which gives me a library of over 200 classic arcade titles. The total hardware cost stayed under $250, thanks to the used rack and the free, open-source software.
Mobility matters in a dorm setting, so I mounted the rack onto a platform with lockable casters. The wheels lock securely, allowing the arcade to be wheeled into a kitchen for a weekend gaming night or back into a study room when exams approach. I added a simple power strip with surge protection to keep the setup safe for shared outlets.
To avoid licensing fees, I turned to OpenGameArt.org for free sprites and sound effects. This approach aligns with the observation from Comics Gaming Magazine that small indie teams win big by leveraging community assets. By swapping in free assets, I kept the budget under $300 while still offering authentic titles like Pac-Man and Galaga.
The final build includes a 24-inch HDMI monitor mounted on a swivel arm, which can be angled for comfortable viewing. A set of reclaimed arcade buttons and a joystick, sourced from a defunct arcade that donated its parts, complete the experience. The whole system occupies roughly 3 ft by 2 ft, fitting neatly against a dorm wall without obstructing foot traffic.
Here’s a quick comparison of component costs for a budget retro arcade versus a commercial mini-cabinet:
| Component | DIY Cost | Commercial Mini-Cabinet |
|---|---|---|
| CPU/Emulation Board | $80 | $250 |
| SSD Storage | $30 | $120 |
| Monitor | $120 | $300 |
| Controls (buttons/joystick) | $45 | $150 |
| Casters & Frame | $25 | $80 |
In my experience, the DIY route not only saves money but also creates a narrative that resonates with fellow students, who appreciate the ingenuity behind each repurposed part.
8-Bit Arcade Strip: Quick Build for 10-Minute Fun
For a lightning-fast arcade experience, I designed a 32-inch strip of 7-segment LED displays wired to an ESP32 microcontroller. The strip runs a custom 8-bit game that mimics the look of 1980s coin-operated machines, where each segment lights up to represent a moving sprite or score counter.
Audio is handled by a compact 4-channel PCM DAC that plugs directly into the ESP32. I programmed a handful of chiptune tracks using the open-source Bfxr tool, then stored them as raw .wav files on the ESP32’s flash. Pressing a button triggers the music, creating a nostalgic soundscape without needing a full speaker array.
The entire build can be assembled in under two hours: cut the LED strip, solder the power leads, flash the ESP32 with the game code written in Assembly for performance, and snap the strip onto a wall-mounted frame. I used the campus maker lab’s soldering stations, which are free for students.
This project doubles as a teaching tool. By exposing the Assembly source, I invited classmates to tweak the game logic, turning the arcade strip into a live coding lab. The hands-on experience echoes the indie community’s emphasis on learning by building, as highlighted by the “Why Small Indie Teams Are Winning Big With Gamers in 2025” piece.
Low-Cost Classic Game Station: Turn a Carton Into Play
The final step in my seven-step plan is the ultra-lightweight classic game station built from an old cardboard box. I reinforced the box with foam core panels to prevent wobble, then affixed a 15-inch touchscreen that serves as both display and input surface. The total material cost stayed under $100, thanks to using recycled packaging and a low-cost Pi Zero W.
Connecting the touchscreen to the Pi Zero W, I installed a stripped-down Linux distro and wrote a Python GUI that scans an external SD card for ROM files. The GUI presents a tiled menu of classic titles, allowing users to launch games with a tap. Because the Pi Zero W supports Wi-Fi, the station can receive OTA updates for new games, keeping the library fresh.
To encourage community growth, I opened a GitHub repository where students can submit new ROMs (where legal) and contribute menu icons or custom shaders. This collaborative model mirrors the indie ecosystem where contributors continuously improve the product, a point emphasized by Polygon’s coverage of 2025 indie highlights.
One practical tip I discovered: mounting the touchscreen on a swivel hinge lets the station double as a tabletop for board games when not in use. The cardboard frame folds flat for storage, making it ideal for dorms where space is premium.
Overall, this low-cost station demonstrates that with a little creativity, you can provide a full arcade experience for under $100, inviting peers to gather around a simple, shared piece of nostalgia.
FAQ
Q: How much power does a dorm-room arcade consume?
A: Most DIY setups run on 5-15 watts, which is well within a standard dorm outlet’s capacity. Using energy-efficient components like Raspberry Pi and LED displays keeps the draw low, so you won’t trip circuit breakers.
Q: Where can I find free game assets for my arcade?
A: OpenGameArt.org offers a vast library of public-domain sprites, sound effects, and music. Many indie developers also share assets on GitHub, making it easy to stay within a tight budget.
Q: Is it legal to host ROMs on a campus arcade?
A: Only ROMs you own the rights to or those released into the public domain are permissible. Encourage contributors to share only legally cleared files to avoid infringement issues.
Q: Can I scale the arcade to include more players?
A: Yes. Modular casters, interchangeable control panels, and network-ready Raspberry Pis let you expand the system. Adding a second Pi and extra monitors can support simultaneous multiplayer sessions.
Q: What safety considerations should I keep in mind?
A: Use fire-rated power strips, keep wiring tidy, and ensure any wooden components are sealed to prevent fire hazards. Verify that all equipment complies with your dorm’s electrical policies before installation.